If you need to backup iPhone data, here is the guide to perform it in all possible ways, from iTunes to iCloud. If you own an iPhone and you need to save your data, videos, photos and contacts to bring the device to service, or simply to have a save of all the important things, then you will have to backup iPhone.
It is a procedure that copies all the data contained in the device and creates a save for later use.
How to Backup iPhone with Mac, iTunes and iCloud
The procedure for making iPhone backups is simple and does not require many steps to complete. In addition, there are several ways to backup iPhone and not just one, all very easy and quick, and above all valid both for those who own a Mac and for those who use a Windows PC.
Backing up with iTunes, for example, is a possible operation for owners of any type of computer, and only requires software developed by Apple that will communicate with your iPhone, unlike the Android backup that requires other types of software.
All you need to backup iPhone is your phone, lightning-USB connection cable , computer and an Internet connection.
How to backup iPhone with iTunes
Making iPhone backups with iTunes is certainly the most popular method to create and save a copy of the data you have on your Apple home device. Using iTunes to backup the iPhone, you can also restore the backup not only of your device but also of other devices, a very useful procedure if you switch from one model of iPhone to another.
iTunes is already pre-installed on Mac computers , while if you use a Windows PC then you will have to download it from the official Apple website, available at this link . To install iTunes on Windows, all you need to do is download the installer, start it, choose your preferred language and click Install. Alternatively, you can also download iTunes from the Windows Store.
Once installed, the procedure for making iPhone backups with iTunes is the same on both Mac and Windows, and is the one described below. First you need to connect the iPhone to the computer through the lightning-USB cable. Once the device is connected, iTunes will recognize it and you may see a warning that must be accepted to start communication between PC and iPhone.
You can choose whether to transfer your photos from iPhone to PC using iTunes, to keep a copy in addition to the general backup of the smartphone.
At this point you will have to click on the phone icon on the left bar of iTunes to select your device and make the backup. Once you reach this screen you will have to transfer your apps and multimedia contents purchased from iPhone to PC by selecting File and then Devices .
Once the data is transferred, you are ready to backup iPhone with iTunes. You must first select the item This computer and then click on Backup. If you want to protect your backup, then also select the iPhone backup encryption item and enter a password to encrypt the backup.
At this point select Make backup now to start the procedure and wait for it to be completed, even if this should take a long enough time. The advice is not to disconnect the smartphone from the PC and not to close iTunes, otherwise you will run the risk of ruining not only the backup, but also the device.
Backup iPhone with iTunes: summary
Here is the summary of the procedure to make backup with iTunes in a simple and fast way:
- Install iTunes
- Select iPhone and click on This Computer
- Select Backup and check the item Encrypt iPhone backup to protect it with a password
- Click on Back up now
- Wait for the backup process to finish
- Click on Finish to complete the backup procedure
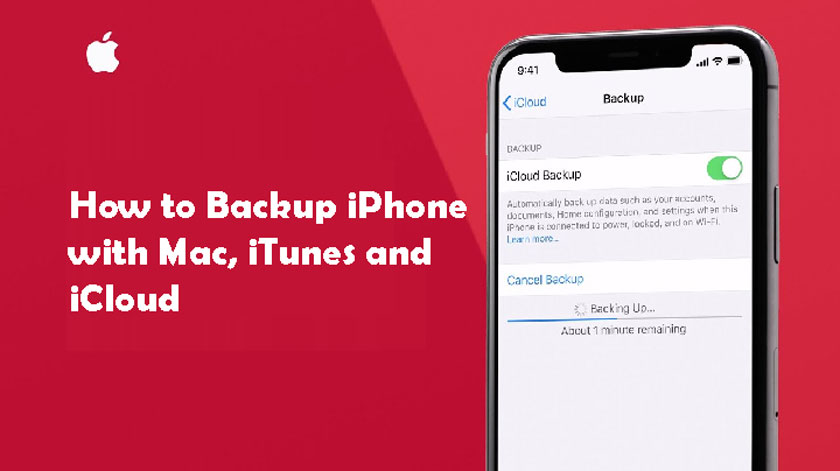
How to backup iPhone with iCloud
After seeing how to use iTunes to backup, the second method is to make iPhone backups with iCloud . iCloud is Apple’s cloud storage service , where the contacts, photos, videos and purchases you made using your Apple ID are saved.
To backup iPhone with iCloud, the procedure involves using only the Apple smartphone. First you need to make sure you have activated iCloud on your device, and this is possible by selecting Settings in the iPhone and then on your name at the top of the screen. Select iCloud and check that the flags are colored green and then on , in particular on the iCloud Backup option .
Now to complete the backup you just have to go to Settings and then your name and select Backup. To start the procedure you must click Back up now , and wait for it to be complete.
IPhone backup with iCloud requires an Internet connection and uses a lot of bandwidth to upload files to the network. Again, you will have to wait several minutes for the procedure to be completed, and we recommend you connect the iPhone to electricity for avoid that it can be downloaded thus affecting the goodness of the backup. Also, make sure you’re connected to a WiFi network and don’t stop uploading the backup.
Backing up your iPhone with iCloud uses the space you have available on Apple’s cloud storage service. The base space is 5 GB but you can upgrade the plan by selecting Settings, then your name and then Manage space.
At this point, just select Upgrade and choose the plan that best suits you, between 50 GB at 0.99 per month, 200 GB at 2.99 euros per month and 2 TB for 9.99 euros per month. Choosing the right plan is essential, especially if you have many photos and videos, such as those downloaded from Facebook.
Backup iPhone with iCloud: summary
Here is a summary of the procedure of how to backup iPhone with iCloud in 5 simple steps:
- Enable iPhone backup to iCloud. The path from the smartphone is Settings – Name – iCloud – iCloud Backup on On
- Connect your iPhone to a WiFi network
- Start iPhone backup by selecting Settings – Backup – Back up now
- Wait for the backup process to complete
- Click on Finish to complete the operation
How to backup iPhone on Mac
If you use a Mac paired with iPhone, then it will be useful to know how to backup iPhone with Mac. To do this, you can use iTunes as seen before, or to rely on third-party software such as dr.fone or iMazing.
Dr.Fone
Dr.Fone is a software that gives you the ability to backup on Mac, as well as being a useful program for managing the files on the device. Dr.fone is not free but it costs 99.99 euros to pay one time , or you can select a free trial version to test it.
Once downloaded from the official website and installed, launch it and connect the iPhone to the Mac using the lightning cable. Before making iPhone backups, dr.fone allows you to choose the items to be included in the save copy and the path where to save the backup.
When you have decided, click on the Backup button and start the procedure. Wait for the necessary time and, at the end, you will receive the backup confirmation message .
iMazing
iMazing is one of several programs that allow you to make iPhone backups on Mac. iMazing is a software compatible not only with macOS but also with Windows, and it is very useful for saving data on the PC.
To download iMazing, all you have to do is go to the official website and select the item Download for Mac . Keep in mind that iMazing is free to make iPhone backups, while it costs 39.99 euros one-off to restore backups and unlock other functions. Also, remember to also install iTunes, in addition to iMazing, in this latter it needs the drivers of the Apple software to be able to work and communicate with the iPhone.
Once installed, open iMazing and connect the iPhone to the Mac and click on the item Backup now in the lower right corner . The procedure is thus started, but first you will see a summary window to choose automatic backups, encode the backups with a password and choose the destination path where you will save the backups.
iMazing also gives you the ability to do automatic saves via WiFi and other options. Once you have selected the options you prefer, you just have to click on Make backup and wait for the end of the procedure, which will return the message confirming the operation.
How to backup iPhone with Finder
From macOS 10.15 Catalina onwards, on Macs you will no longer find iTunes to backup, but you will have to backup iPhone with Finder .
To start the procedure you just have to connect the iPhone to the Mac, open the Finder and select the device icon on the left sidebar. On iPhone, for example, it is not possible to backup to SD card, as happens on Android, so this procedure, like all the other views previously, becomes fundamental.
At this point the steps are the same as previously seen to backup with iTunes, only this time you will be using Finder.
How to backup iPhone with Finder: summary
Here is the summary of how to backup with Finder in 7 quick steps:
- Connect iPhone to Mac and open the Finder
- Select the iPhone icon on the left sidebar
- Click on This Computer
- Select Backup and choose to check the entry iPhone backup encryption if you want to use a password to protect the backup
- Click on Back up now
- Wait for the Mac to complete the backup procedure
- Click on Finish to end the backup
How to restore iPhone backup
Once backed up, you can also restore it. As for the backup procedure, there are also several ways to restore iPhone backups , ranging from iTunes to iCloud or even via third-party programs, if you have used them.
iTunes – Finder
To restore iPhone backups with iTunes, all you have to do is connect the device to the PC with the supplied lightning cable and then open iTunes. Select the device icon from the sidebar but this time click on Restore backup in the summary screen.
If instead you connect the iPhone to the PC for the first time and make the first activation, iTunes will ask you if you want to configure iPhone as a new device or if you want to restore the backup from the list of available backups, if any. In this case, all you have to do is select the backup you are interested in restoring on the iPhone and complete the procedure.
To restore the backup with Finder, the procedure is the same, only that Finder is available for restoring backups only from macOS 10.15 Catalina and later.
iCloud
If you backed up through iCloud, you just have to restore it through Apple’s cloud storage service.
To restore iPhone backups with iCloud, enter the Device Settings and click on General. At this point choose Restore and select Initialize content and settings . This will reset the phone to factory settings.
Once the procedure is complete, wait for the iPhone to turn on and select Restore from iCloud backup to use the most recent backup. We remind you that also in this case a stable WiFi connection with good bandwidth is required.
Dr.fone – iMazing
If you used dr.fone or iMazing to backup, you can restore it through the same software. Connect the iPhone to the computer, open dr.fone or iMazing and select the Restore backup option . At that point you just have to follow the wizard and finish restoring the backup, remembering that this feature is not available in the free versions of the two software.
Make iPhone backups on a third party service
Keep in mind that iPhone backup requires a lot of space on the device where you want to store it or, alternatively, on the cloud service you use. Apple, as already stated, makes iCloud available to its customers, but the free version includes only 5 GB, which may not be enough if you decide to also save photos and videos in the cloud.
For this reason we recommend an external cloud service to be used to save files, multimedia content such as photos or videos, and always have a backup copy in case of emergencies. The proposals are cloud services on which to save the backp in a totally free way, with a storage space large enough to be useful.
Choose the cloud service
One of the best cloud services to keep your backup is Google Drive for sure . The Big G service provides 15 GB of free storage space where you can store your backup or photos, videos and audio. All you have to do is create a Google account, if you don’t already have one, and log in to Google Drive.
Our second option is Microsoft OneDrive , the Microsoft branded service that is synonymous with reliability and security. In this case the free storage space is 5GB, but OneDrive also gives you the opportunity to use the Office package online in its entirety, very useful for consulting and editing documents.
The third option that we recommend is certainly the best, namely Mega. Mega is a totally reliable cloud storage service that allows you to use 50GB of space absolutely for free, after creating an account. This is certainly the best choice, especially if you have many files, photos or videos to keep.
Any service described above, however, allows you to automatically upload photos and videos to save them online and make your backup. All you have to do is enable the function from the application settings on your iPhone.