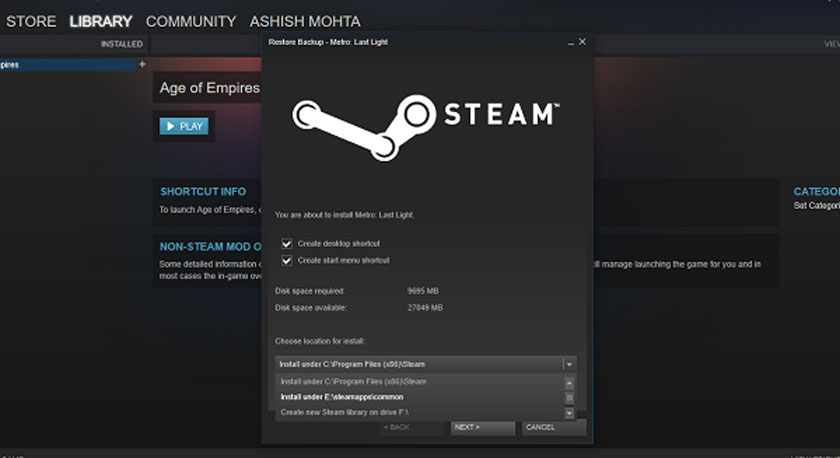
It’s always a good idea to install Steam Games on a drive that has more space than the default C drive, but if you didn’t notice then you’d better do it now. The C drive is probably the least reliable place to have anything that matters, and games tend to take up a lot of space, too.
How to move Steam games to another drive
Today we are going to teach you how to move Steam games to another drive without having to reinstall them, simply by dumping all the data from one directory to another.
To complete this process you will have to take two steps. You’ll first need to create a new Steam library folder on the hard drive you want to move the game to. Once created, all you have to do is enter the game properties and choose the new folder to relocate all your files there.
Learning how to do this is ideal, for example, if you decide to install a new hard drive on your computer and want to move all your data and games to it. It is also practical if you want to free up space on your main disk and take certain games to the secondary.
Lastly, it is also useful if you want to keep the game on the same hard drive but prefer to move it to another folder. As always, it is very important that first of all you make sure you have your Steam client updated to the latest version.
This functionality has been around for a long time, but it never hurts to make sure you have it updated before starting to tangle. Once the check is done you can start.
First create a new library folder
The first thing you have to do is create a new Steam library folder on the hard drive where you want to take your game. Steam only allows you to move the games in the library folders that you have preconfigured. To do so, in the upper bar of the client click on the Steam menu, and choose the Parameters option.
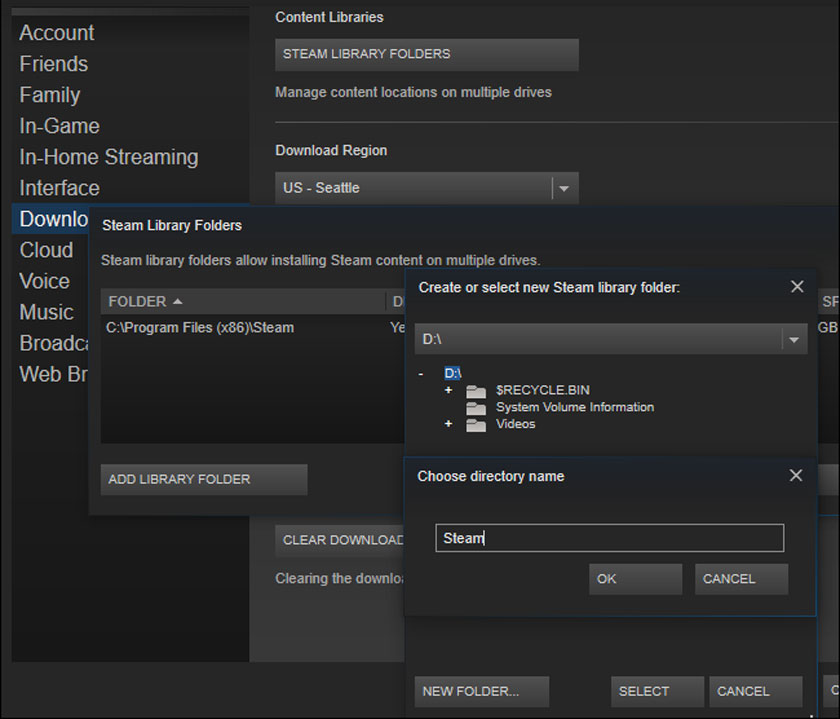
Once you are in the Steam configuration parameters, on the left you will see a bar with various options. Click on the Downloads option. When you do, several parameters will appear on the right side. Here you have to click on the first of all, the Steam Library Folders button.
A window will open in which the default folders in which you can put your games will appear. Now you have to create a new folder on the hard drive that you want to move one of them to. For first click the Add Library folder button.
A file explorer will open. In it you have a tab at the top with the default address of your current folder for Steam games. Click on it, and when it is displayed you have to choose the storage unit in which you want to create this second folder to be able to move your games there.
When you do, all the folders you have on that hard drive will appear below. It is important to remember that the library folder must be empty and exclusive to Steam. Therefore, if for example you already have a Games folder created , select it, but then press the Create Folder button to create a new folder in the directory.
By default this new folder will be called SteamLibrary. Leave it with the same name or give it another one of your preference and press the Accept button . Now, make sure you have selected that new folder that you have created for Steam games and press Select .
Once you finish the whole process, as a result you should now have a new Steam library folder , the default and the one you have created. By right clicking on the new folder you can make it the default so that all new games are installed there by default, although the latter is not necessary.
Move your Steam game to another drive
The process to move your games to another hard disk is individual, which means that you can move your installed games one by one to another unit where you have another pre-configured library folder. To start doing it, right-click on one of the games you have installed and choose the Properties option .
In the properties window that will open, first click on the Local Files tab at the top . In it you will have several options, and you have to click on Move installation folder to proceed to change all files.
When you do, a new window will appear with the additional library folders you have created. For example, in the screenshot you will see exactly the same folder that we created a while ago. You just have to choose this folder and click on Move Folder to start the process.
And that’s it, Steam will start moving all the site files and when it is finished you will have your game installed on the hard drive where you have configured the new library folder.