
Crop a Photo Using Photoshop: Photoshop is a very popular photo editing application for both novice and professional users. In this application, there are many interesting and certainly functional photo editing features. One of the most used is the crop feature. Let’s learn how to crop photo using Photoshop to improve your editing skills in this application.
Cropping or cutting this object is the basic technique most often used in editing using Photoshop. With this technique, you can cut a specific object with any shape and then paste it into another worksheet. Well, as a basis, you must know how to crop this photo.
Let’s try, how to crop a photo using Photoshop quickly, here are the steps
1. Open the application, open the file to be cut
The first step, open the Photoshop application first. If so, in the main view, you will see various menu options at the top of the screen. Select the ‘File’ menu then select ‘Open’ again. Then open/select a photo file that you will edit from your computer storage. After that tap on the ‘Open’ button.
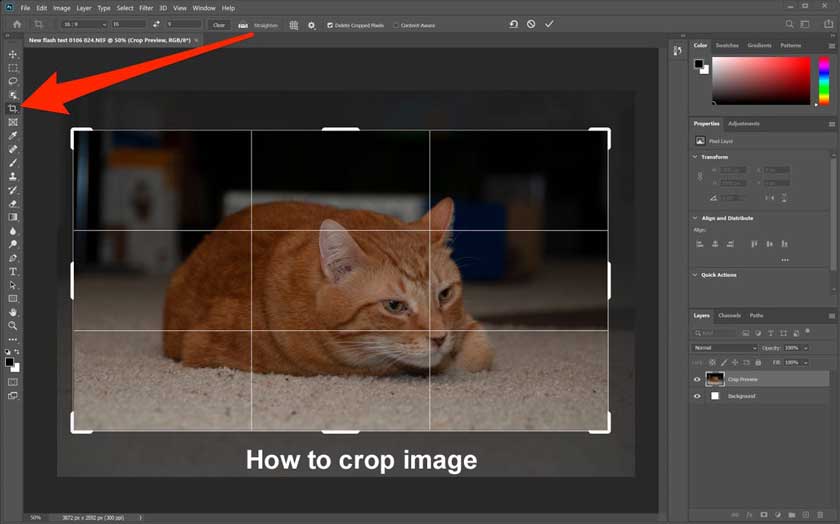
2. Select Tool ‘Quick Selection Tool’
The next stage of how to crop photos in Photoshop is to select the ‘Quick Selection Tool‘ tool in the row of tools on the left of the display. If so, then just do the object selection process. Select the object area that you will crop. If not quite right, zoom in object. If you have excess object selection, reduce it by selecting the ‘subtract from selection’ icon.
Conversely, if something is still missing, use the ‘Add to selection’ tool. You can find these menus at the top of the worksheet view. When finished, make sure the object you selected is correct by pressing ctrl + shift + i from the keyboard.
After making sure that the object you are going to crop is correct, then just cut or crop the photo object that you selected earlier. The trick is to press the CTRL + X keys from your keyboard simultaneously.
3. Create a New Worksheet, Paste the Cropped Object
After you make sure the object to be cropped is correct by following the previous steps, the next step from how to crop a photo in Photoshop is to open a new document or worksheet. Press the CTRL + N keys from your keyboard.
When opening this new worksheet, adjust the size of the canvas or worksheet with the crop object that you did before. Or, you can set the size larger.
Then, paste the object that you cropped earlier by pressing CTRL + V. Then your crop will be copied into this new worksheet. After that, your cropped object will be displayed in this new worksheet. If it is then the cropped object you can edit again as needed later.
If the crop of the object you are doing is still not neat, you can still edit it using other Photoshop tools such as an eraser tool or other tools. If it’s really neat and according to your wishes, don’t forget to save your crop edits.
To save, click on the File menu in Photoshop. After that select the Save/Save As menu. Save your resulting image in JPG / PNG format as needed. If the format is PNG, you can still edit these edits later.
That was the explanation of how to crop photos in Photoshop that you can follow. Cropping or cutting this object is a basic technique that you should master when editing using photoshop. Therefore, by learning how, you can move on to other editing techniques.