
Screencast applications aim to give users a high quality video. A good screencasting tool should be light enough not to weigh down the system and be easy enough to use so that users do not have to watch multiple tutorials to start recording with it.
If you want to record a screencast with voiceover on macOS, you have two options. You can record the audio separately and add it to the video in post-production, or you can record the audio as you record your screen. If you want to use the second option, the default macOS screen saver utility will do the job.
How to record a Screencast with Voiceover on macOS
- On your Mac, open the screenshot utility. You can open it by searching it in Spotlight or from Launchpad. The trick is to access its user interface and not just the quick screen capture feature.
- Once you see the screen capture utility bar, select the screencast option to use. Both options allow you to save the entire screen or save a selected area.
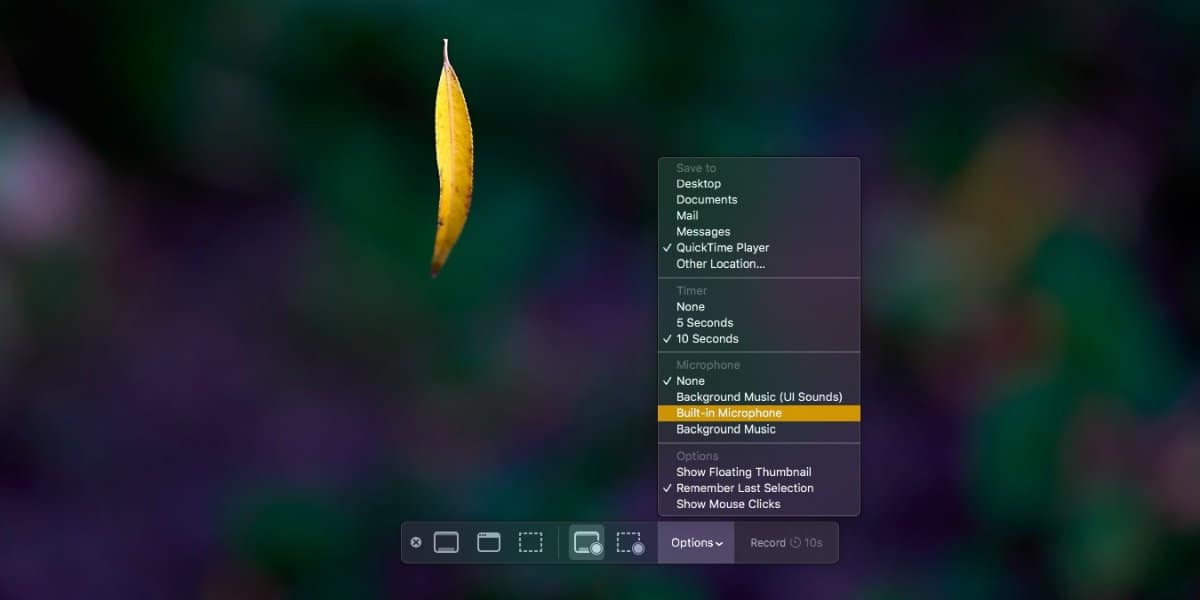
- Once you’ve selected a screencast type, click the Options drop-down menu next to it. You will see a long list of items that you can enable / disable.
- Under “Microphone”, select the microphone you want to use to record the voiceover. Then you can start recording your screen and any audio input detected by the microphone will be recorded with it.
- If you want to register multiple input devices, you can configure an aggregated audio device on macOS, which typically combines multiple audio devices.
The final file you will get will be much larger than a file without audio. MacOS saves the screen with the best possible quality, so you can be sure that the audio quality will be just as good and that the file will be larger.
This will not, however, compensate for background noise. It is something that you must take care of yourself. The audio quality is the sound compression quality detected in the video and its bit rate, among other things.
Note that another option for audio is ‘Background Music (UI sounds)’. By selecting this option, you record the audio sounds of the user interface that you get when you interact with your system.
For example, when you move files to the Recycle Bin under macOS, you hear a particular sound. This sound and others, like this one, will be recorded when this option is selected.