
Change the Time Format: As with its predecessors, Windows 10 also shows the date and time on the right side of the taskbar. By default, the watch shows the time in 12-hour format, which many people don’t like to see for their own reasons.
If you want to display the time in 24-hour format, you can set the time so that the time is displayed in 24-hour format. The new Settings app does not offer a way to switch between 12 and 24-hour formats. We have to use the classic control panel to make these changes.
Change the time format to 24 hours in Windows 10
How to change system tray time in Windows 10 to 24-hour format.
Step 1:Open the Control Panel. Change the view to small icons.
Step 2:Click the Region link to open theRegion dialog. Here, on theFormatstab, click theMore Settings button.
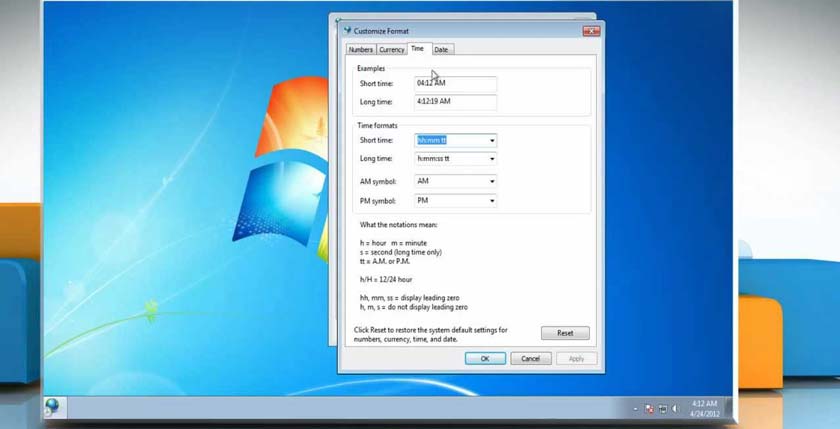
Step 3:Switch to theTime tab. In the Time formats section, replace the “h” fields in a short time and a long time in “H” to switch to the 24-hour format.
Since you have switched to the 24-hour format, you no longer need AM and PM in addition to the time. To remove AM and PM, remove “tt” from the Short Term and Long Term fields.
Click on the buttonApplyto the new 24-houractivitydisplay.
Thus, you can Change the Time Format to 24 hours in Windows 10. If you have any issues, comment us in the comment box.
.