
You have just bought a domain name for your website on OVH? Do you now want to create a beautiful professional email address with the name of your website in the extension? It’s very simple, in this article we will guide you step by step so that you can create it in less than 10 minutes, watch in hand!
How to create a professional email address on OVH?
Prerequisites
To be able to create a professional email address on OVH, you must first have your domain name subscribed to a hosting (server). At OVH, you have the choice between several offers (see more details here )
As you can see, a Kimsufi Web hosting at 1.49 / month will allow you to create up to 2 business addresses. If you wish more professional address you will have to choose other offers of OVH (ex: Personal, 10 accounts …)
No stress, you can subscribe to OVH hosting at any time, while you bought your domain name or after.
Creating your professional email address
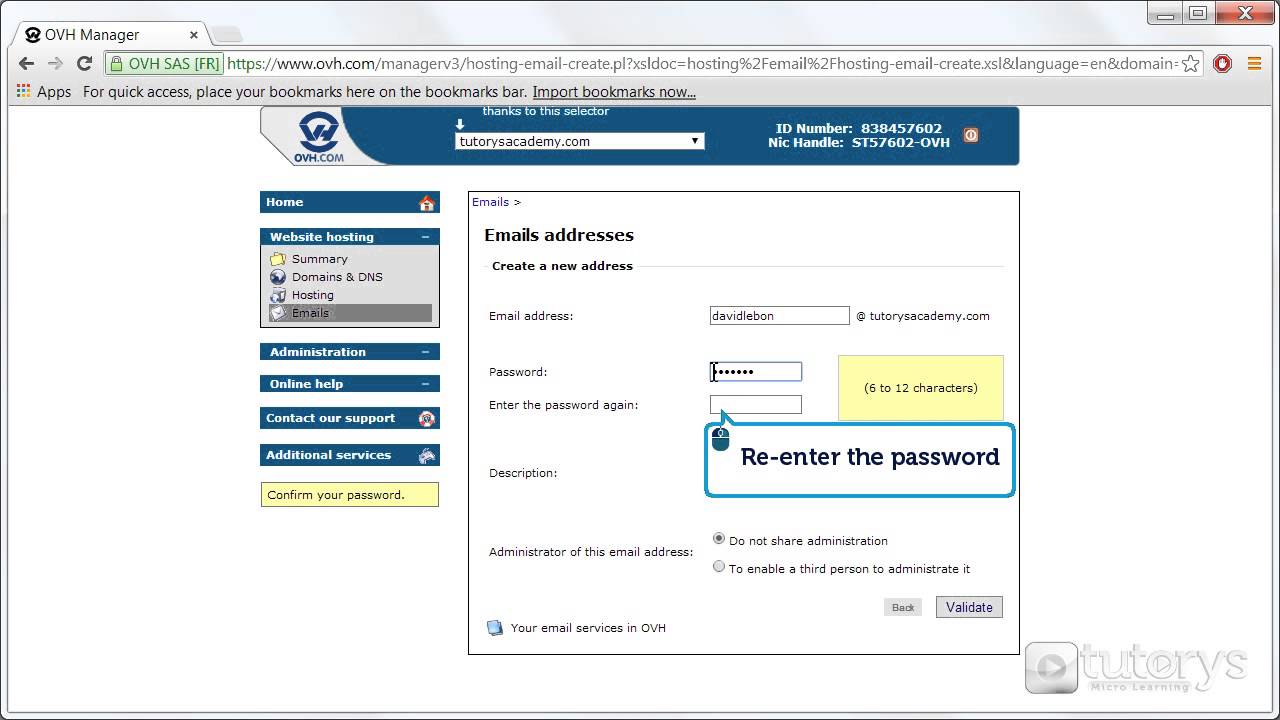
> Once you have subscribed to the hosting of your choice, you can finally access the ” Emails ” tab of OVH to configure your email address.
> Select your website
> Click on Emails
> Click on ” Create an e-mail address ” in the right side menu
> In the ” Account name ” field fill in the name of the email address (for example: if your name is Adrien, contact adrien to create the email address adrien@mon_site_internet.fr)
> The ” Description ” field is optional, no need to fill it
> In the ” Account Size ” field fill in the storage size you wish to assign to this e-mail account
> In the fields ” Passwords ” enter a password that is complex enough to prevent you from having your business address hacked (here are our tips for choosing your password here )
> Click ” next ” once you’re done
If all the information is good, click next if not on previous to retrace your steps.
> Choose your type of device on which you want to install the email account. If you want to install it on a Gmail account, click on ” Other ”
> Click on ” Confirm ” to create your professional email address
> If you have followed the steps well, you should see an information message in a green box with the message ” Your email account is being created. It will be available within 5 to 10 minutes ”
> Your email address appears in the email address list
> You’re done, your professional email address is now created, you just have to connect it to your tools like Gmail, Outlook and others
Send emails with my OVH address
To access the OVH e-mail portal click on the “Access webmail” button on the side menu on the right, then fill in your information to log in
Once connected to the Webmail, click on ” Redirect ” to write your first message with your new email address pro.
Connect your OVH address to Google Gmail
Yes, we know! The portal of OVH is not beautiful and you want to see your emails on Google Gmail, it is possible, here is a new article that will explain how to do: