
Remove iCloud Drive: Recently we have seen how to recover deleted files on iCloud. We will now detail how to permanently remove files on iCloud Drive, ie prevent deleted files from being restored.
How To Remove iCloud Drive Files Permanently
You may have noticed this, but deleted iCloud files do not go to your computer’s Recycle Bin (be it Windows or Mac) although you delete them just like the others. This can reassure you because on your iPhone, there is no trash.
iCloud Drive has its own temporary trash. It is not accessible from your file explorer on your computer. Keyboard shortcuts will not help you.
Good to know: move one or more files to the Recycle Bin: Delete on Windows and Command + Delete on Mac. Shift + Delete will permanently delete a file without going through the Recycle Bin. However, be careful when Shift + Command + Clear on Mac, you empty your Recycle Bin, the effect is not the same.
You will have to go to the iCloud.com site or use the iOS app.
Method 1: For computers, delete from iCloud.com
As you can see, opening your Recycle Bin is no good for iCloud Drive files. A browser will be much more useful.
Of course, a browser can be used on computers as on smartphones or tablets. However, when you go to the iCloud.com site from your iPhone, the only feature available is the location of your iPhone (which also exists in application). That’s why there is an iOS app for iCloud Drive Files (see Method 2) that makes it easy to manage your documents.
Let’s start:
1.1. Open your browser on iCloud.com ;
1.2. Identify yourself with your iCloud ID;
1.3. Click iCloud Drive ;
1.4. Find the equivalent of temporary trash by going to Deleted recently, bottom right;
You have the choice, 2 options are available to you:
1.5. Click Delete All, which is equivalent to emptying your Recycle Bin ;
1.6. Select one or more items from the folder
1.7. Prefer to delete only the selected files.
To be certain of making the right choice, feel free to click on the i to have information about the item you are about to delete for good.
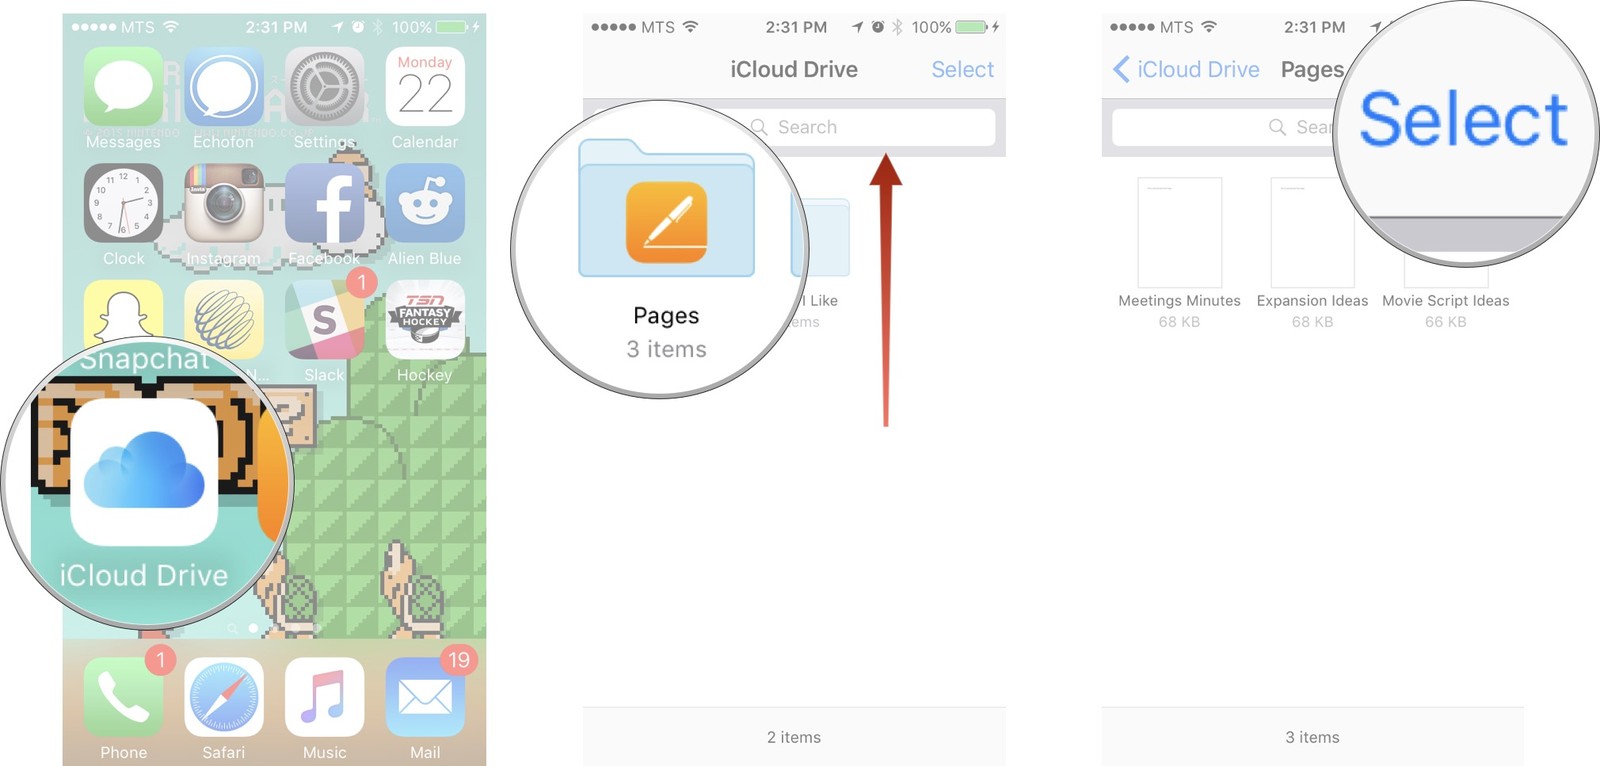
Method 2: On iOS, Permanently Delete with Files
Prefer to use your iPhone, iPad or iPod touch? Everything will happen in the Files application, formerly iCloud Drive.
The deletion is the same as anywhere else in iOS: you swipe left and then press Delete (one file at a time) or Select items and then tap the Trash icon.
This has the same effect as on your computer: the files are moved to the iCloud Drive Temporary Recycle Bin. Let’s erase them irrevocably.
2.1. Open Files ;
2.2. (optional) If Explorer is not displayed and you have the option to go back, press Back to return to the home page;
2.3. Tap Recent deletes ;
This time, 3 options to permanently delete files are available to you, including 2 favorites to iOS:
2.4. Drag the file to the left;
2.5. Press Delete ;
2.6. Press Select. ;
2.7. Select the file (s);
2.8. Press Delete ;
2.9. Hold down the file;
2.10. Press Delete.
It is also by keeping the pressure on a particular file that you can view its Info if you want to make sure to delete the right item.
Whether you are on a computer or on iOS you can access the iCloud Drive Temporary Recycle Bin. If you do not want to wait 30 days for a file to be deleted you can delete it (or recover it) before the deadline. Some methods allow bulk deletion while others will promote file deletion one by one.